Sunday, January 30, 2011

Buddy the Blood Drop!

Meet Buddy the Blood Drop!
Buddy works at the Alaska Blood Bank promoting blood donation.
William met Buddy the Blood Drop at a festival this past fall while I was there selling my work.

There was a contest for children to draw their interpretation of Buddy &
William won 1st place for his artwork! 
William's drawing of Buddy will serve as the new logo for the Blood Bank.


Good job Will!
Now can you help me with a logo project I'm working on??

Saturday, January 29, 2011

Skyline ~

Yesterday morning we were treated to a beautiful skyline!

This is a picture from our back yard.  Just too beautiful to not enjoy so instead of heading out to school William & I took a walk to take pictures & talk about the skyline.

Then we came home & goggled for information about why the
sky is pink & here's what we learned;

The color of the sky is determined by which colors of light from the sun get scattered around the atmosphere(the air around the earth). When red light is scattered the sky looks red. When you look at the sky your eyes are sensing the light that is being scattered around the atmosphere. Blue light is normally scattered by the gases oxygen and nitrogen which make up most of the atmosphere while red, yellow, and other mixtures of light pink passes right through. However, unlike the gases such as nitrogen and oxygen that do not scatter red and pink light, other particles such as water, pollution, and dust can and do scatter red and pink light making the sky look different shades of red or pink. So when the sun light has to pass though lots of pollution, dust, or water particles red and pink light can get scattered along with the blue making the sky look red or pink. This often happens when it is very polluted, when there is lots of water or dust in the air, or during the morning or dusk when sunlight passes though more of the atmosphere to reach us giving it more opportunities to scatter off of stuff in the air.

So, in a nutshell the color changes in the sky is caused by pollution.

When I was a child my Grandma used to say it was
Mrs. Clause in North Pole frosting cookies. 
I think I like that explanation better!

Wednesday, January 26, 2011

Creepy Noise in the Night

Hummmm....so it's about 3 am & I'm up. 
 "Why" would be a good question
but I'm often up in the
middle of the night to work, to worry, & yes more ...worry.

I hear a cry. 
A scream outside. 
 A container of files falls off a shelf.
"That's weird," I think to myself...but then there are no coincidences.

So I turn on the outside lights
(thanks to Fred & his Dad who added more outside light to our house this past summer)
& in the darkness I see two shadows running fast down the alley.

Only shadows.  Moving fast.  It's creepy.

I've been watching too many "Twilight"  & "New Moon" re-runs.

(don't flame me on my movie choices...the books were a great read on long airline flights!)

Thursday, January 20, 2011

Hurry, Hurry It's Show Time!

Yes, it's show time! 

I'm frantically finishing up my color catalog, getting samples finished & packed, digging out tables & draping, finding show lights....it goes on & on.  It's always hectic packing & setting up the booth but once I'm settled in it's usually a fun & busy weekend.

Tomorrow is the start of the Alaska Food & Gift Show & runs through Sunday. 
 If you're a retailer looking for lines to purchase for the spring & summer
this is the place to shop!  There are a few other artists like myself & lots of reps both from Alaska & Outside. 

I'm in booth 501 ~ corner booth right as you come in the front doors.
Stop bye & say "hi" or write an order.


Hope to see you this weekend!

Wednesday, January 19, 2011

Bullseye Recycled Part II

I'm a member of the Alaska Metal Arts Guild (AMAG) & we're having a post holiday get together.  This is a great group who's always up for sharing metal work techniques & a party!

The parameters of the gathering were to bring a brown bag with the goods you're trading for the exchange auction.  So I have lots of things to share but no "brown bag" to use as the
nondescript container.
What to do??  Make one of course out of Bullseye glass paper.

When crated glass arrives from the Bullseye factory, every sheet of glass is sandwiched between a double layer of waffle paper.  Sometimes in blue, pink, yellow but also in the requested brown.  I re-use every piece of this paper for packing up my work.  My son loves to draw & use ink stamps on it & in a pinch it makes for great wrapping paper tied up with string...sort of rustic retro, no?

OK, first step is to cut a rectangle in the desired size & then fold so you have a small 2-3 inch flap (see crease on the right above) & a center fold.  It's good to just fold so you have these guides & then open up flat.  I used grey duct tape all the way around the rectangle for reinforcement.  This looks industrial but duct tape comes in a gazillion colors so red would have looked good if I'd had it.

Second step.  Fold it up & re-adjust for size if needed before you secure the sides.


Third step.  Add more lovely duct tape to the sides. 
Note that you start on the inside under the flap.  Cut at the bottom edge & fold the tape over to the back side.  If needed, you can add more tape on the corners....an alternating color would also look good as accents on the corners.

Step 4.  Add a closure.  I'm adding a button style closure using grommets to hold it in place.
Simply punch a hole with a paper punch, place the cardboard button over the hole & then secure in place with grommets.  You can purchase the metal grommets & setting tool very inexpensively at Michael's Crafts.

Here's the grommet tool in action.


The two buttons in place & now tie it up with string.  A colorful elastic also looks good.


I also did a little stamping on the outside for a little inspiration.  Wha-la!  A gift bag!

Saturday, January 15, 2011

Story Boards in Fused Glass

 This is really a post about recycling Bullseye.

Bullseye glass is my favorite glass to work with for fusing & other glass processes.  I order glass by the hundreds & thousands of pounds & everything arrives carefully packed between layers of paper in wooden crates.  As a result I have lots of paper, wood, screws from the crates, shredded packing paper & more!


One new thing I played around with during the holidays was creating "story boards."  I've made these before but decided I'd recycle the wood from the Bullseye crates.  First disassembling the crates, cutting the boards in strips, painting the strips of wood & problem solving a hanger or hanger slot for the back.  I still haven't worked that out so if anyone has any ideas please post a comment.  I thought about using a Dremel with a router bit? 
Think that would work all you wood-working experts?


Here's a close up of one "page" on the story board.


Here's the basic idea of the story board wall plaques.  These are small but I like to work bigger using a whole board from the crate.  They look nice hung in groupings.  These of course have Alaskana images on them as I'm comtemplating the Alaska Gift Show that's coming up this next weekend.  I think these are still in the idea phase & not polished enough for wholesale/resale market but maybe next year?

Sunday, January 9, 2011

Anchorage Museum Gala ~ Donation Time!

Every April the Anchorage Museum hosts its Annual Gala.

We're lucky to live in a city that has a museum that brings exhibits such as "Star Wars," "GOLD," "Andy Warhol," & this spring a collaborative exhibit with the American Museum of Natural History called "The World's Largest Dinosaurs."  Of course it takes lots of money via memberships, sponsors & fundraisers to bring such blockbusters to Anchorage.

Here's the piece I'm donating to the "Gala" party 2011.  Check out the Anchorage Museum site for current & upcoming exhibits!  See you at the Gala!!


Size: 16" X 22" finished in iron stand
Materials:  Bullseye Art Glass, iron oxide text transfer process,
kiln fired at 1500 degree Fahrenheit

Friday, January 7, 2011

Milleforie Revisited ~

When an artist works in glass the
techniques & possibilities are endless!
People always ask me about "stained glass" or label "fused  glass" (kiln-fired) as "stained glass."  I've never done stained glass or really have a desire to do it.  I crack up when people say..."oh, you must have patience to do this..."   PATIENCE? 
 Ahhhh, that would be a big negatory people. 
My Mom's mantra to me as a child was...."patience, child, patience." 
I consider it my good karma to not be drawn to stained glass work.

I appreciate it ~ I just don't want to do it!!
 I originally worked in hot glass which is glass processes in the 2000 F (1093 Celsius) degree range which includes glass blowing & torch work.  Warm glass is in the 1000 to 1700 (537 - 926 Celsius) degree range.  Actually, anything up from room temperature is considered "warm".  Cold working glass includes stained glass & finishing techniques such as grinding, sanding, cutting, etc.  Often pieces are hot or warm worked ~ then cold worked & then fire polished....which typically means putting it back in the kiln & "warming" the little sucker back up to about 1000 degrees to smooth & make the edges shiny. 

OK ~ a little background. 
Since I used to work exclusive in hot glass I'm pretty comfortable around torches & furnaces.  I used to make lots of beads & then as I got into fusing made lots of component parts on the torch for my fusing & glass blowing.  I love to make murrini & do mini roll-ups.  It's like quilting...making all the component parts, re-cutting & combining to make more complex & intricate pieces that give the "wow" factor in your art.

One technique on the torch is to "pull cane" or build "milleforie."  There's ways to do it in fusing.  One technique is the "rod pod." 


Here's a picture of the "rod pod"  mold. 
A mold is a bisque form layered with glass wash to form warm glass.


Here's a side view. 
 It looks like little troughs that you fill with glass & then fuse together into rods & then the rods are cut cross section.  Each little cross section are their own little art piece & these can be built together into larger more complex pieces.


Here's an example of torch worked milleforie.  Many people recognize "milleforie" as an Italian word.  It means "many flowers" & in reality is just a technique for layering glass.  It's not strictly a technique owned by Italian glass workers. 
The Italian's have just popularized it & made it recognizable.


Here's how to do it in the rod pod. 
 I usually cut some lengths of glass ~ rods & stringers in about 6 inch lengths.  This length fits in my rod pod & if I don't like the combination I don't have hundreds of chips to use.

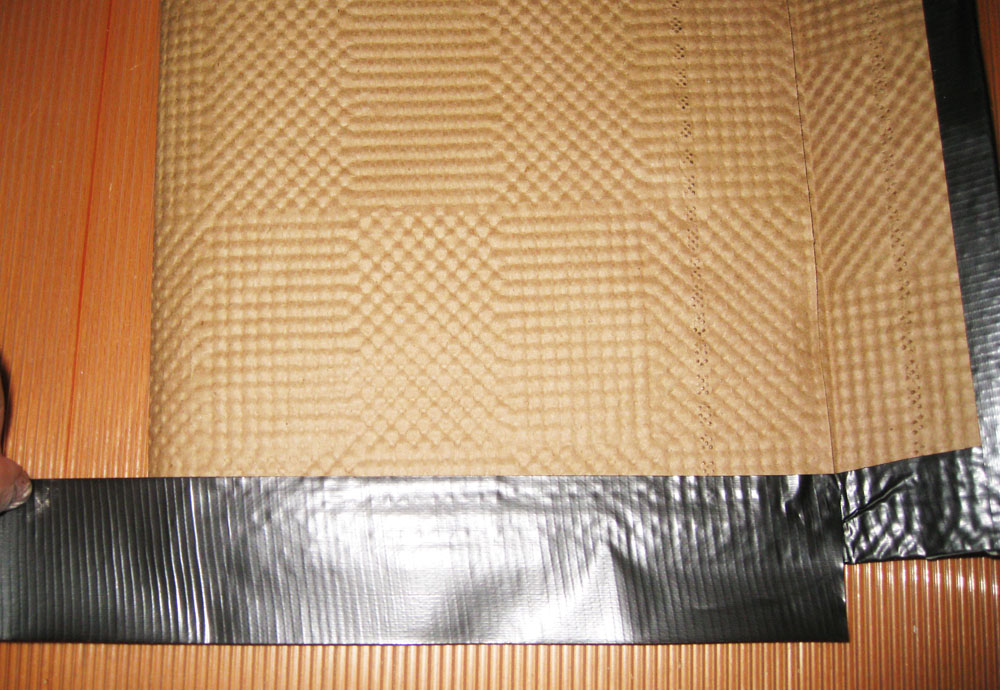
Quick shot of a rod in the center with 1mm stringers around the rod & then a layer of larger 2mm rods.  I tape them in place using this "satin" finish tape.  It disappears during the firing.
(that's worth a post in & of it's self ~ note to self)


Here's the roll up in the rod pod...taped up like a mummy!


Four different colored rods taped together.  After taking this photo I noticed ~ for the first time ~ that one of the rods has a blue center!   Geez.....what a loser I am!
That's important as it adds another dimension to the finished piece. 


Here's a few roll ups in the rod pod fired at 1400 degrees Fahrenheit.  They are
 ...just.... starting ....to ....stick... together ...
but there's still lots of distinction. 
 I was worried that if I tried to cut them apart they would break into pieces....so...
 

Here they are fired at 1425 degrees Fahrenheit.  Melted together but still good color distinction.

The following are three separate pieces that were created from milleforie.


FLOWERS

 
STARS


My Favorite ~ CIRCLES.

Wednesday, January 5, 2011

The Ugly Coffe Table Fix ~ Or Not??

So, we have this old & ugly coffee table. 
Well, "ugly" or "beautiful" ....it's all in the eye of the beholder, right?

We used it at our Girdwood cabin for a number of years & more recently used it as a bench at the end of our bed.  It's oak, sturdy, & has been painted a number of different colors over the years as our decorating taste changed.  It's still in good shape & I have a tendency to hold on to things & try to reinvent them as our needs change.

So, this time around it's been painted black & I decided I would make a glass top.  Somewhere along the line the original clear glass top was either broken, cut up to be used for another project, or fused for another float glass reincarnation.

I have six sheets of 16 X 20 float so thought I'd try to piece these together in three layers with a copper insert.  I usually use one continuous sheet of glass on the top for a seamless finish but this piece is almost 48" long by 16" & I don't have a piece of float that big ~ so I must improvise!


Here's the layout pre-firing.  Two layers of pieced glass on the bottom, a layer of copper, & then another pieced layer of glass on the top.  The seams were staggered for strength.  The lines you see in the copper are a reflection of the kiln elements in the lid.  I'm not totally sure what will happen at the seam lines with float.  It's harder & more brittle than Bullseye & I have to use a different firing schedule ~
I'm not sure the seams will "heal" or fuse together or slightly pull apart(?)


Here's a close up of the border detail.  You can see two seam lines.


Here's the same shot post firing.  The red line on the right is a seam on bottom or middle layer and the black line on the left is a seam on the top layer.  Both seams allowed oxygen & probably more heat into the glass thus the increased processing of the copper.  Copper reacts with increased heat by changing color:  Natural color, orange, red, green, black.
I guess I should have thought about this a little more & included more seams on the top as part of the overall design....note to self for future experiments. 
I like how the copper moves & crinkles up as a reaction to the heat. 
It provides more interest in the finished piece.


Here's the finished glass top. 
The little dots are bumpons that I stuck on the bottom of the glass so it doesn't slide around.  In reality these aren't noticed as they are clear & the copper is darker & not so orange in color. 
Glass is tricky to photograph as there's lots of flash back & reflection. 

What do you think?  Keeper or garage sale item???