Showing posts with label recycled art. Show all posts

Saturday, October 26, 2013

Up-cycled Microwave Tray ~ 3rd try!

The microwave tray transformation continues with this
3rd installment.


This one has cast glass dragonflies, butterflies, & fish as well as
fused glass pieces, blobs & beads.

Most of the glass is transparent although some of the beads
are opaque & add some contrast.

It's been hanging in the greenhouse without any problems
with gravity & temperature.

Tuesday, August 13, 2013

Recycling Bullseye ~ the continuing saga...

The studio has been crazy busy & I'm blowing through the glass so
yesterday I needed to crack open a new case of
Bullseye Tetka.
 
These cases are tightly secured with metal straps,
packing paper, Styrofoam, screws....
YIKES, it's a process to get the lid off of a crate of glass.
 
Upon prying off the lid I had a nice (or not so nice)
surprise inside the box!
 
 
A wasp nest!
 
Just a little one.

 
Close up.  You can see the comb inside but there
wasn't any larvae or bees around so it must be abandoned.
 
Good thing because these bees are vicious & not sweet like my honey bees.

 
Apparently, the wasps have found a way to recycle Bullseye crates too!

Tuesday, March 8, 2011

Wine Bottle Boats ~

Yes, this post is about recycling again. 
Wine bottles again.
I keep trying to come up with new ways to recycle the bottles
so here's a twist on the wine bottle tray.


A new favorite wine is "Valley of the Moon" chardonnay.
It's crisp, smooth, & yummy with everything from salmon to pasta.
Flavor aside, it's also bottled beautifully with a silver decal that
is retrained regardless of temperatures upwards of 1500 degrees.


After the bottle is fused flat into the typical tray it's slumped into a mold~
I call it the bottle boat mold....I have no idea what it's really called?
Even after the second firing the decal remains & is fused into the glass.

The neighborhood boarding mine is called "Valley of the Moon." 
Cool, eh? 
The wine bottle boat is a popular gift item in Anchorage for all the downtowners.
I've sold them as fast as I can drink the wine...only kidding...sort of.
Anyone out there want to help me??  :)


After it's slumped into the mold it's now a boat...er...bowl!


Ta-Da ~ Side view! 
Look!  Even a cute handle was created from the neck of the bottle!
These are great little trays for nuts or dips & best of all the glass is being
recycled & kept out of the landfill. 

Wednesday, January 19, 2011

Bullseye Recycled Part II

I'm a member of the Alaska Metal Arts Guild (AMAG) & we're having a post holiday get together.  This is a great group who's always up for sharing metal work techniques & a party!

The parameters of the gathering were to bring a brown bag with the goods you're trading for the exchange auction.  So I have lots of things to share but no "brown bag" to use as the
nondescript container.
What to do??  Make one of course out of Bullseye glass paper.

When crated glass arrives from the Bullseye factory, every sheet of glass is sandwiched between a double layer of waffle paper.  Sometimes in blue, pink, yellow but also in the requested brown.  I re-use every piece of this paper for packing up my work.  My son loves to draw & use ink stamps on it & in a pinch it makes for great wrapping paper tied up with string...sort of rustic retro, no?

OK, first step is to cut a rectangle in the desired size & then fold so you have a small 2-3 inch flap (see crease on the right above) & a center fold.  It's good to just fold so you have these guides & then open up flat.  I used grey duct tape all the way around the rectangle for reinforcement.  This looks industrial but duct tape comes in a gazillion colors so red would have looked good if I'd had it.

Second step.  Fold it up & re-adjust for size if needed before you secure the sides.


Third step.  Add more lovely duct tape to the sides. 
Note that you start on the inside under the flap.  Cut at the bottom edge & fold the tape over to the back side.  If needed, you can add more tape on the corners....an alternating color would also look good as accents on the corners.

Step 4.  Add a closure.  I'm adding a button style closure using grommets to hold it in place.
Simply punch a hole with a paper punch, place the cardboard button over the hole & then secure in place with grommets.  You can purchase the metal grommets & setting tool very inexpensively at Michael's Crafts.

Here's the grommet tool in action.


The two buttons in place & now tie it up with string.  A colorful elastic also looks good.


I also did a little stamping on the outside for a little inspiration.  Wha-la!  A gift bag!

Saturday, January 15, 2011

Story Boards in Fused Glass

 This is really a post about recycling Bullseye.

Bullseye glass is my favorite glass to work with for fusing & other glass processes.  I order glass by the hundreds & thousands of pounds & everything arrives carefully packed between layers of paper in wooden crates.  As a result I have lots of paper, wood, screws from the crates, shredded packing paper & more!


One new thing I played around with during the holidays was creating "story boards."  I've made these before but decided I'd recycle the wood from the Bullseye crates.  First disassembling the crates, cutting the boards in strips, painting the strips of wood & problem solving a hanger or hanger slot for the back.  I still haven't worked that out so if anyone has any ideas please post a comment.  I thought about using a Dremel with a router bit? 
Think that would work all you wood-working experts?


Here's a close up of one "page" on the story board.


Here's the basic idea of the story board wall plaques.  These are small but I like to work bigger using a whole board from the crate.  They look nice hung in groupings.  These of course have Alaskana images on them as I'm comtemplating the Alaska Gift Show that's coming up this next weekend.  I think these are still in the idea phase & not polished enough for wholesale/resale market but maybe next year?

Wednesday, January 5, 2011

The Ugly Coffe Table Fix ~ Or Not??

So, we have this old & ugly coffee table. 
Well, "ugly" or "beautiful" ....it's all in the eye of the beholder, right?

We used it at our Girdwood cabin for a number of years & more recently used it as a bench at the end of our bed.  It's oak, sturdy, & has been painted a number of different colors over the years as our decorating taste changed.  It's still in good shape & I have a tendency to hold on to things & try to reinvent them as our needs change.

So, this time around it's been painted black & I decided I would make a glass top.  Somewhere along the line the original clear glass top was either broken, cut up to be used for another project, or fused for another float glass reincarnation.

I have six sheets of 16 X 20 float so thought I'd try to piece these together in three layers with a copper insert.  I usually use one continuous sheet of glass on the top for a seamless finish but this piece is almost 48" long by 16" & I don't have a piece of float that big ~ so I must improvise!


Here's the layout pre-firing.  Two layers of pieced glass on the bottom, a layer of copper, & then another pieced layer of glass on the top.  The seams were staggered for strength.  The lines you see in the copper are a reflection of the kiln elements in the lid.  I'm not totally sure what will happen at the seam lines with float.  It's harder & more brittle than Bullseye & I have to use a different firing schedule ~
I'm not sure the seams will "heal" or fuse together or slightly pull apart(?)


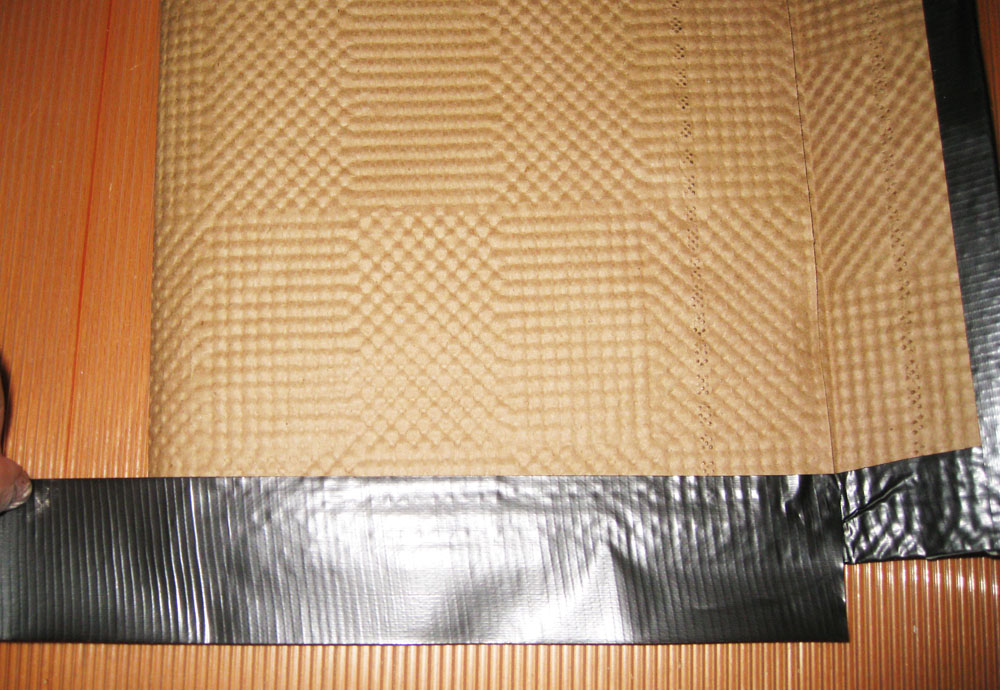
Here's a close up of the border detail.  You can see two seam lines.


Here's the same shot post firing.  The red line on the right is a seam on bottom or middle layer and the black line on the left is a seam on the top layer.  Both seams allowed oxygen & probably more heat into the glass thus the increased processing of the copper.  Copper reacts with increased heat by changing color:  Natural color, orange, red, green, black.
I guess I should have thought about this a little more & included more seams on the top as part of the overall design....note to self for future experiments. 
I like how the copper moves & crinkles up as a reaction to the heat. 
It provides more interest in the finished piece.


Here's the finished glass top. 
The little dots are bumpons that I stuck on the bottom of the glass so it doesn't slide around.  In reality these aren't noticed as they are clear & the copper is darker & not so orange in color. 
Glass is tricky to photograph as there's lots of flash back & reflection. 

What do you think?  Keeper or garage sale item???

Tuesday, June 29, 2010

How To Give Without Being Taken ~


a great article by Luann Udell.

When I owned the gallery I was asked almost daily to donate work to a
multitude of non-profit organizations. I said "yes" to virtually every single request.

My standard donation was a recycled wine bottle tray.
They are beautiful, ,made from recycled wine bottles & make a fun addition to any silent auction.
I always thought it was good karma to give back to my community in a small way ~ and this was usually the only way I could give to many events.
I bought into sales pitch that "it's good for the gallery."

Currently, I'm asked almost weekly to donate a piece of my work to some cause or event. It's always followed up with "here's our 501c3 number for tax purposes." Just to clarify; a 501c3 number is a non-profit organizations IRS number that they use when filing taxes. It has nothing to do with a donation that I might make to their organization. Only cash donations are deductible ~ artwork or in-kind donations are not deductible for an artist.

This is a well written article explaining an artist's perspective to donation. If you're an artist you'll read it & smile. I tease my husband (who works for a non-profit bye the way) that I'm not a non-profit....people only think I am!!
If you work for a non-profit & ask for donations you might cringe.

Hopefully, we'll all learn something.

Thanks Luann for a thought provoking article.

Monday, April 5, 2010

Box Art ~

Hummm.....Who's in that box ("house") ?

There's a child in there...wearing a paper hat ("turban").

And a recycled can ("bracelet").....

Everything is cool if you put the right spin on it!